A well-lit home looks better before anyone even reaches the front door. Good exterior lighting adds curb appeal, improves security, and makes your house feel finished after dark. If you are wondering how to install outdoor lighting on house exteriors, the real answer starts before a single fixture goes up. The best results come from a clear plan, the right product for the surface, and an honest look at whether you want a weekend project or a long-term system.
Start with the lighting goal
Homeowners often start by shopping for fixtures, but placement matters more than style at first. Think about what you want the lighting to do. Some houses need safer walkways and brighter entry points. Others need a softer architectural glow across the roofline, garage, columns, or landscaping. If your goal is year-round curb appeal, permanent outdoor lighting usually makes more sense than installing something temporary that has to come down and go back up every season.
That is where the project can branch in two directions. One path is standard exterior fixture replacement, like swapping porch lights or adding wall sconces. The other is installing a custom outdoor lighting system that highlights the home itself. Both can work, but they involve different materials, wiring demands, and long-term expectations.
How to install outdoor lighting on house exteriors the right way
Before you drill, mount, or run wire, look at the house during the day and again after sunset. Notice dark gaps near doors, corners, and garage bays. Pay attention to rooflines, peaks, soffits, and architectural details that would benefit from even illumination instead of a single harsh floodlight.
A balanced lighting layout usually includes three layers. First is functional lighting at doors, garage entries, and steps. Second is accent lighting for features like stonework, columns, or landscaping. Third is decorative or programmable lighting for holidays, game days, entertaining, and everyday ambiance. Homes that feel polished at night almost always use a combination rather than relying on one bright fixture near the front porch.
You also need to know what surface you are attaching to. Vinyl siding, brick, stucco, wood trim, soffits, and fascia all call for slightly different mounting methods. That matters because outdoor lighting should look intentional, not patched together. Poor mounting can lead to visible wires, water intrusion, uneven fixture lines, or damage to the exterior.
Pick the right kind of outdoor lighting
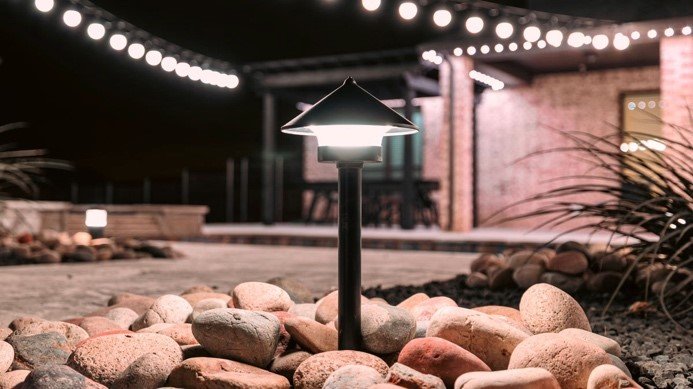
Not all outdoor lighting products are built for the same job. Traditional wall fixtures work well at entry doors and garages, but they will not create a clean roofline effect. Solar lights are easy to place, but they can be inconsistent in cloudy weather and often do not deliver the polished result homeowners expect on a front elevation. Low-voltage landscape lighting is excellent for gardens and paths, though it usually needs a transformer and thoughtful cable routing.
For homeowners who want a cleaner, more integrated look, permanent outdoor lighting systems are often the better fit. These systems mount discreetly to the house and can be programmed for everyday use, holidays, team colors, and special occasions. The big trade-off is installation complexity. A high-end system looks simple once it is installed, but getting that straight, low-profile finish takes planning and experience.
If you are comparing options, think beyond the first day of installation. Ask how visible the track or housing will be in daylight, how durable the components are in Midwest weather, and whether the lighting can be customized by zone, color, and brightness. A cheaper product can become expensive if it fades, fails, or looks obvious on the house.
What you need before installation
If you are handling a basic fixture install yourself, gather the right tools first. That usually includes a voltage tester, drill, weather-rated fasteners, exterior caulk, wire connectors rated for outdoor use, a ladder, and safety gear. If you are replacing an existing fixture, the electrical box and wiring may already be there. If you are adding a brand-new light where no wiring exists, the project becomes much more involved and may require a licensed electrician.
For low-voltage or permanent lighting systems, planning is even more important. You need to know the power source location, the route for wires or channels, how the system will be controlled, and where connections will be protected from moisture. This is usually the stage where homeowners realize that what seemed simple on paper can turn into a very visible installation if it is rushed.
Installing standard exterior fixtures
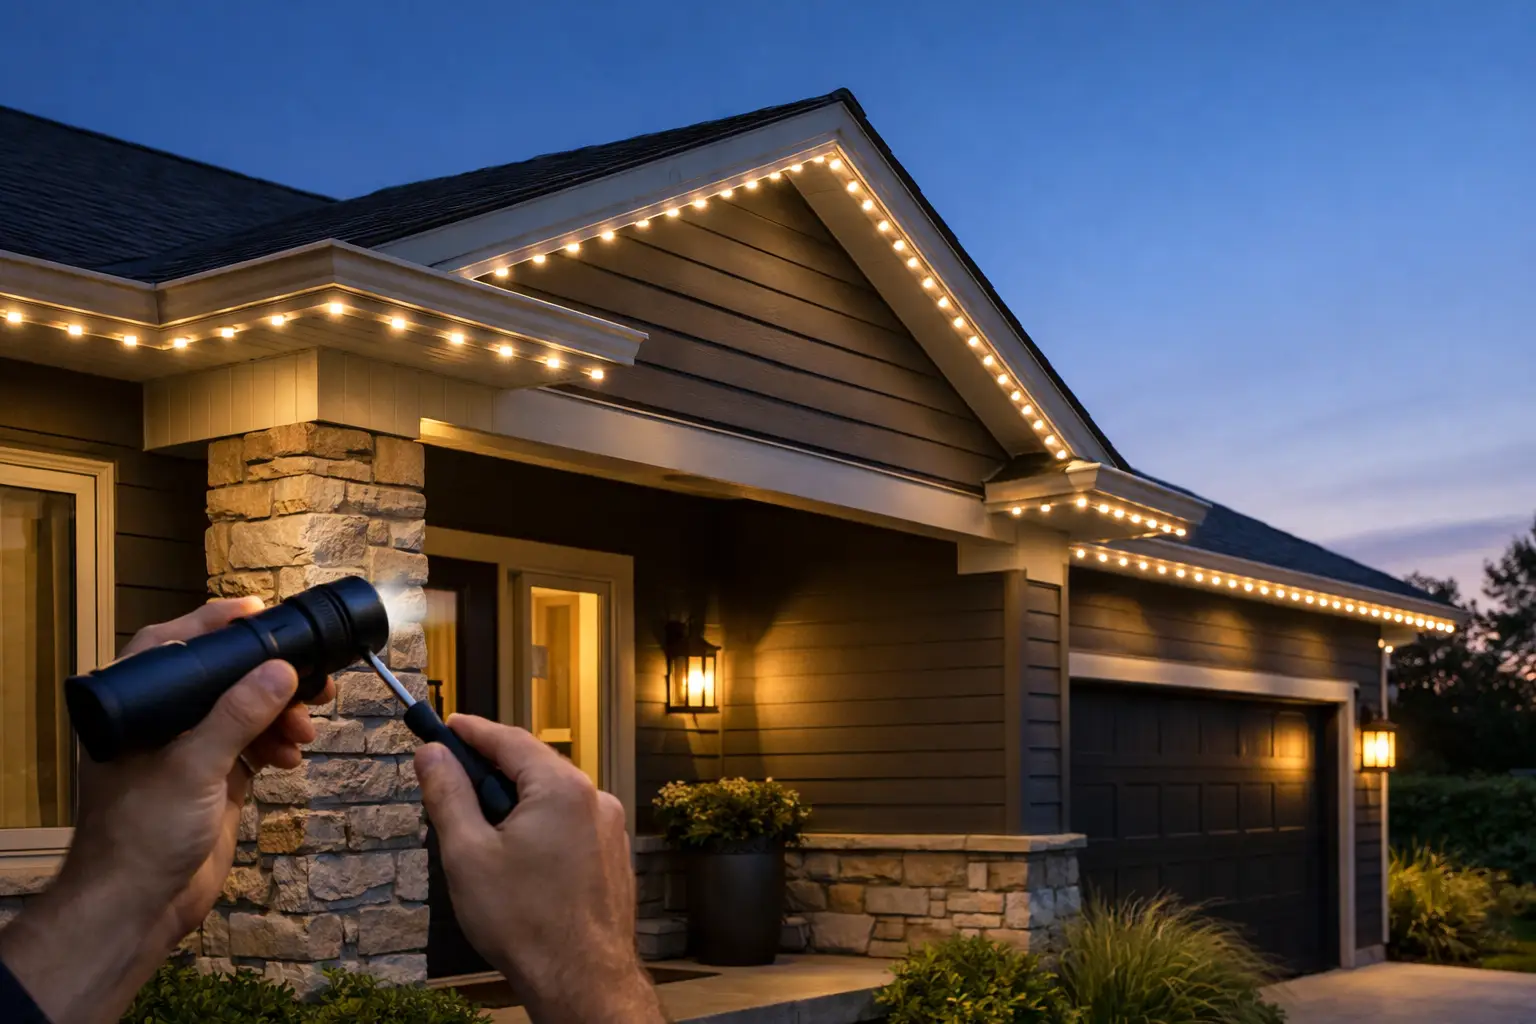
If you are replacing an existing porch or garage light, start by shutting off power at the breaker and confirming with a tester that the circuit is dead. Remove the old fixture carefully and inspect the electrical box. If the box is loose, corroded, or not rated properly for exterior use, fix that before going further.
Next, connect the new fixture wires according to the manufacturer instructions, secure the mounting bracket, and make sure the fixture sits flush against the wall. Use exterior-rated sealant where needed to keep water from getting behind the base. Once installed, restore power and check the light at night, not just during the day. A fixture that looks centered in sunlight can cast awkward shadows after dark.
This kind of installation is manageable for some homeowners, but there are still risks. Older homes can have brittle wiring, undersized boxes, or previous repairs that were not done correctly. If anything looks questionable, it is worth pausing before turning a simple upgrade into an electrical problem.
Installing low-voltage and permanent lighting systems
This is where precision matters most. For roofline or architectural lighting, spacing, alignment, and concealment are what separate a premium finish from a distracting one. Fixtures or tracks need to follow the lines of the house cleanly. Power supplies and controllers need to be placed where they are accessible but not intrusive. Wiring should be hidden and protected, not draped where it will catch the eye or weather.
Permanent systems also need to be matched to the home. A large two-story house with multiple peaks, dormers, and entry points should not be treated like a small ranch. The number of zones, brightness levels, and mounting points all depend on the structure. It is rarely a one-size-fits-all project.
This is one reason many homeowners choose certified installation instead of trying to piece it together on their own. Professional installers can map the layout, protect the exterior finish, and create a result that looks clean in daylight and impressive at night. For a permanent lighting product, workmanship is part of the product.
Common mistakes homeowners make
The most common problem is overlighting. Brighter is not always better. Too much light can flatten the look of the house, create glare, and make architectural details disappear. A better approach is controlled, even illumination that highlights the home without overwhelming it.
Another mistake is mixing unrelated fixture styles or color temperatures. Warm white near the front door and a cool blue-white floodlight over the garage can make the house look disjointed. Consistency gives the exterior a more custom feel.
Then there is installation quality. Crooked lines, exposed wiring, poor fasteners, and bad sealing can all take away from the result. On a home exterior, details are not small details. They are the project.
When to hire a professional
If the project involves new wiring, roofline mounting, custom programming, multiple lighting zones, or a permanent system, professional installation is usually the smarter move. It saves time, protects the house, and gives you a finished result that does not look improvised.
It also gives you accountability. A licensed and insured installer brings product knowledge, safe electrical practices, and a design perspective that most homeowners only gain after trial and error. That matters when the lighting is meant to improve property value and daily enjoyment, not just check a box.
In Northwest Ohio and Southeast Michigan, weather is part of the equation too. Wind, snow, rain, and seasonal temperature swings can expose weak materials and poor installation methods fast. A professionally designed system is more likely to hold up and keep looking sharp year after year.
The best install is the one that fits your home
The answer to how to install outdoor lighting on house exteriors depends on what you want from the finished project. A simple sconce replacement is very different from a permanent color-changing lighting system that outlines the architecture and works every night of the year. One may be a DIY task. The other is usually worth doing once and doing right.
If your goal is a home that feels more welcoming, more secure, and more polished after dark, focus on quality over shortcuts. The right lighting should look like it belongs there from the start, and when it is installed well, that is exactly how it feels.